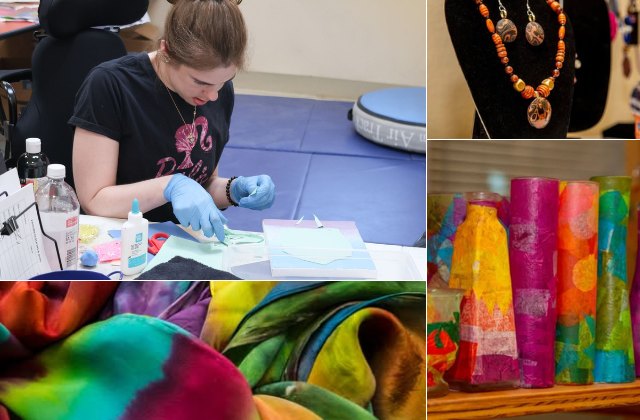
Crafting is more than just making things. It’s a chance to explore your creativity, connect with others, and create something uniquely yours.
We designed these projects to be accessible, fun, and full of opportunities to feel proud of what you’ve made.“Exploring creativity is amazing on so many levels, I love to see our participants evolve their artistry over time,” said Daryll Borges, Fine and Performing Arts Supervisor at Opportunity Village. “I hope these ideas spark inspiration for many others too.”
1. Personalized stationery and cards
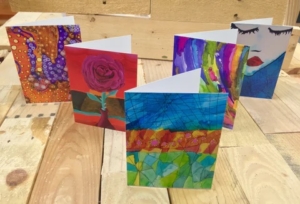 Crafting cards isn’t just about paper, glue and fine motor skills — it’s a way to show someone you’re thinking of them.
For adults with disabilities, it’s a gentle and meaningful way to express emotions, especially when words are hard to find. There’s something special about seeing the joy on someone’s face when they receive a handmade card.
What you’ll need:
- Blank cards or sturdy paper
- Markers, colored pencils, or crayons
- Stickers, stamps, or pressed flowers
- Glue or double-sided tape
How to make it:
- Start simple — what kind of card do you want to make? Birthday? Just a note to say “hi”?
- Decorate the front with whatever feels right — stickers, a quick doodle, or some pressed flowers.
- Write your message inside. It doesn’t have to be long, just heartfelt.
Why it works: Crafting cards is about more than creativity. It’s about making connections, one thoughtful gesture at a time.
🎨 Tip: Experiment with textured paper for a sensory experience, or add glitter for a touch of sparkle.
2. Hand-painted scarves and ties
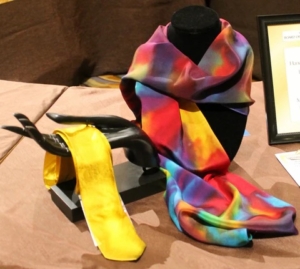 There’s a special kind of fun in making something you can actually wear. A scarf with swirls of color or a tie covered in bold patterns — each one is a little piece of art you can carry with you.
It’s messy, creative, and satisfying, especially when you step back and think, I made that.
What you’ll need:
- A plain white scarf or tie (silk works best, but use what you have)
- Fabric paints or dyes
- Brushes or sponges
- Something to protect your table — old newspaper or plastic
- Gloves if you’re using dye (to protect from stains)
How to make it:
- Start by laying your scarf or tie flat. If you’ve got an idea for a design, great—if not, just grab your brush and see where it takes you.
- Dip into the paint and start creating. Dots, stripes, swirls—it doesn’t have to make sense.
- If you’re using fabric dye, try scrunching or folding the fabric before you add color for some cool effects.
- Let it dry, then set the design with an iron (follow the instructions on your paint or dye).
Why it’s worth trying: This project isn’t about getting it perfect — it’s about enjoying the process. The silk feels amazing to work with, and when you’re done, you’ve got something unique. It’s hard not to smile when someone asks, “Where did you get that scarf?” and you get to say, “Oh, I made it.”
3. Paintings and drawings
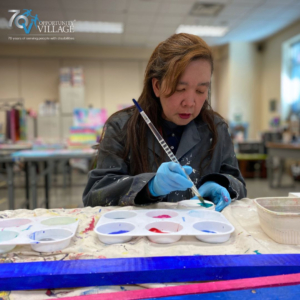 Painting and drawing can be whatever you want them to be — calming, expressive, playful, or even a little messy.
It’s not about being “good” at it; it’s about letting your imagination take over. For adults with disabilities, it’s a way to tell a story, explore emotions, or just enjoy putting color on a page.
What you’ll need:
- Blank canvas, sketchpad, or even some sturdy paper
- Watercolors, acrylic paints, or markers
- Brushes of different sizes
- A cup of water and paper towels (if you’re painting)
How to make it:
- Start by picking something to draw or paint — a memory, a favorite scene, or even just shapes and colors you love.
- If you’re using paints, dip your brush and let the color flow. Don’t worry about making it perfect—just let it happen.
- Add layers, details, or textures as you go. Play around with sponges, fingers, or even leaves for unexpected effects.
- Let your work dry, and then find a place to display it. You made it; you should show it off!
Why it works: Art allows you to express things you might not have words for. Plus, there’s a deep sense of pride in looking at something you’ve made with your own hands.
🎨 Tip: Experiment with sponges, fingers, or even household items for unexpected textures.
4. Dedicated dances for loved ones
This one’s all about movement — and meaning. Whether it’s twirling to their favorite song or choreographing a simple routine, creating a dance for someone special is a fun and thoughtful way to say “I care.”
What you’ll need:
- Some space to move around
- Music that makes you feel something
- Comfy clothes that let you stretch, spin, and groove
How to create it:
- Pick a song that feels right. Maybe it reminds you of a memory, or maybe it just makes you smile.
- Think about the story you want to tell. Is it joyful? Quiet and reflective? Let that guide your moves.
- Practice, then share it — live, on video, or just in the moment.
Why it works: Movement connects people. It’s a way to communicate when words fall short, and it feels good to share a little joy.
5. Polymer clay creations
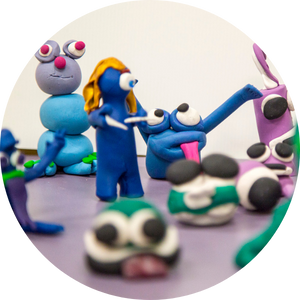 Working with clay is like going back to childhood — but better. The squish of the clay. The satisfaction of shaping it into something unique. Polymer clay is always a hit. Plus, you end up with something that lasts.
What you’ll need:
- Polymer clay in a few colors (start with your favorites!)
- A smooth surface to work on
- Tools for shaping (a butter knife works in a pinch)
- An oven for baking your masterpiece
How to make it:
- Roll, squish, and knead the clay to get it soft and easy to shape.
- Think small: keychains, little animals, beads for a bracelet. It doesn’t have to be complicated.
- Bake it as per the instructions on the package, and let it cool.
Why it works: Clay projects are wonderfully tactile, and there’s something magical about turning a blob into something you can hold onto forever.
🎨 Tip: Finish with a glaze for shine and durability.
6. Colorful jewelry
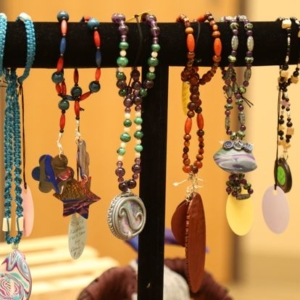 Beads, wire, and a dash of creativity — that’s all it takes to make jewelry that feels like you. Whether it’s a bracelet for a friend or a necklace for yourself, there’s something calming about stringing beads and watching your design come to life.
What you’ll need:
- Beads (big, small, shiny — pick your favorites)
- String or wire
- Scissors
- Clasps (optional, but they make things easier)
How to make it:
- Spread out your beads and play around with patterns. What colors or shapes feel right?
- Thread them onto the string, one by one, until it feels finished.
- Tie it off or add a clasp for a polished look.
Why it works: Jewelry-making is as much about the process as the product. It’s relaxing, tactile, and a perfect way to create something that’s uniquely yours.
7. Decoupage glassware
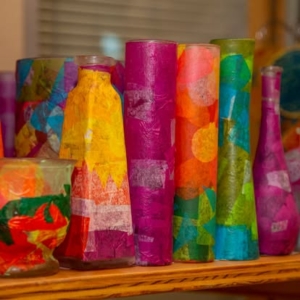 Here’s the thing about decoupage — it looks fancy, but it’s actually easy and fun. It’s all about layering, experimenting, and turning a plain jar or vase into something that feels special.
What you’ll need:
- A clear vase, jar, or even an old bottle
- Decorative paper, napkins, or fabric scraps
- Mod Podge or clear-drying glue
- A brush
How to make it:
- Cut your paper or fabric into shapes — stripes, hearts, flowers, whatever you like.
- Brush glue onto the glass, press your pieces down, and smooth out any air bubbles.
- Add a top layer of glue to seal everything in place, then let it dry.
Why it works: Decoupage is forgiving (messy edges? No problem!) and personal. It’s also a great way to reuse materials you already have.
🎨 Tip: Combine multiple layers of paper for a collage effect.
8. Felt crafts
If you’re looking for something soft and simple, felt is your friend. It’s easy to work with, and you can make almost anything — flowers, ornaments, or even tiny characters for a story.
What you’ll need:
- Sheets of felt in a few colors
- Scissors
- Fabric glue or a needle and thread
- Buttons, sequins, or other decorations
How to make it:
- Cut out shapes — start with something easy, like flowers or stars.
- Stick or stitch the pieces together. Don’t worry if it’s not perfect — imperfections add charm.
- Add a few details, like a button in the middle of a flower or sequins for sparkle.
Why it works: Felt is forgiving, so you can experiment without stress. And when you’re done, you’ll have something cute and tangible to show for your effort.
🎨 Tip: Create small felt animals or characters for storytelling or playtime.
9. Puzzle wall art
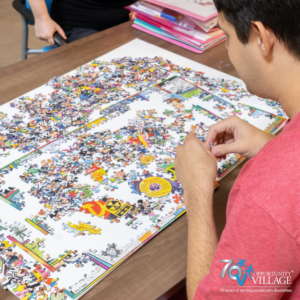 Puzzles aren’t just for rainy afternoons — they can turn into real art. Putting one together is calming, and turning it into wall art means you’ve got something to celebrate when it’s done.
What you’ll need:
- A puzzle (choose a design you love)
- Puzzle glue (reuse your Mod Podge from the decoupage project)
- A backing board or frame
How to make it:
- Put the puzzle together — take your time and enjoy the process.
- Once it’s complete, carefully brush puzzle glue over the top to hold it all together.
- Mount it onto a backing board or pop it into a frame, and it’s ready to hang.
Why it works: This project is all about patience and pride. Plus, you’ll have a unique piece of art that reminds you of the journey.
10. Baked cookies in a decorated box
 The smell of cookies baking in the oven. The fun of decorating a box with your own flair. The joy of giving something homemade. This project checks all the boxes.
What you’ll need:
- Cookie dough (homemade or store-bought — no judgment here)
- Baking supplies (tray, parchment paper, etc.)
- A plain box or tin
- Markers, stickers, or paint
How to make it:
- Bake your cookies — simple ones work best, like chocolate chip or sugar cookies.
- While they cool, grab your box and start decorating. Think bright colors, fun patterns, or a heartfelt message.
- Once the cookies are cool, pack them into your box and add a ribbon or note if you’d like.
Why it works: Baking combines creativity with sensory joy, and sharing the finished product makes it even sweeter.
11. Heartfelt poems
Writing a poem isn’t about perfecting every word — it’s about saying what’s on your mind or in your heart. Poetry can be as short or as simple as you like, and it’s a lovely way to share your thoughts with someone special.
What you’ll need:
- A notebook or paper
- A pen or pencil
How to write it:
- Start by jotting down some words or phrases that come to mind — think about a memory, a person, or even just a feeling.
- Play around with those words until they flow into lines. Don’t overthink it. Poetry is about expression, not rules.
- Read it aloud or share it with someone when you’re ready.
Why it works: Poems don’t just capture thoughts; they connect people. They’re like little windows into what’s on your mind.
🎨 Tip: Use sensory language to bring your poem to life, like describing the sound of rain or the warmth of sunlight.
12. Decorate your own ornaments
Ornaments aren’t just for the holidays — they can hold memories, stories, or even little surprises. Making your own is a creative way to turn simple materials into keepsakes you’ll treasure.
What you’ll need:
- Clear plastic or glass ornaments
- Glitter, sequins, or confetti
- Small objects like beads, dried flowers, or tiny trinkets
- Glue or Mod Podge
- Ribbon or string
How to make it:
Option 1: Glitter ornaments
- Remove the ornament top.
- Swirl a bit of glue inside, then sprinkle in glitter.
- Shake it gently to spread the glitter, then let it dry.
Option 2: Filled ornaments
- Remove the top and carefully place small items inside — think dried flowers, beads, or little notes.
- Replace the top and tie a ribbon for hanging.
Why it works: Ornaments capture moments in a beautiful and deeply personal way.
🎨 Tip: Customize ornaments with paint pens or stickers to add names, dates, or messages.
Enroll for more
 Crafting is about discovering joy, building confidence, and creating something meaningful. Does this list make you or your loved one feel inspired? Check out our Fine Arts Program — it’s jam-packed with activities like these to support your creative passions. Learn through individualized and group training while you enjoy self-expression, social interaction and the company of other participants.
You can support our team of artists by buying their handmade crafts. Browse their impressive creations in our studio store.


